Chocolate. The word itself evokes richness, decadence, and pure indulgence. It’s a cornerstone ingredient in the pastry arts, capable of transforming simple desserts into sophisticated masterpieces. From glossy glazes and crisp coatings to delicate decorations and rich fillings, chocolate offers unparalleled versatility. But working with chocolate effectively, especially when aiming for that professional shine, satisfying snap, and smooth melt-in-the-mouth quality, requires more than just melting a candy bar. It demands an understanding of chocolate itself and, crucially, mastery of the technique known as tempering.
Many aspiring bakers encounter frustration when their melted and cooled chocolate turns out dull, streaky, soft, or develops unsightly white spots (bloom). These issues arise from not controlling the crystalline structure of the cocoa butter within the chocolate. Tempering might sound like a complex process reserved for professional chocolatiers, but it’s a fundamental skill for any serious pastry baker wanting to unlock chocolate’s true charisma. Let’s delve into the world of chocolate, demystify tempering, and explore basic techniques for working with this captivating ingredient.
Understanding Your Medium: Types of Chocolate for Pastry
Before tempering, it’s vital to know your chocolate. Not all “chocolate” is created equal, especially for pastry applications.
Real Chocolate vs. Compound Coating:
- Real Chocolate: Contains cocoa solids (for flavor and color), cocoa butter (the natural fat from the cocoa bean, crucial for texture, melt, and requiring tempering), sugar, lecithin (an emulsifier), and sometimes milk solids or vanilla. Its quality and behavior are largely determined by the amount and quality of cocoa butter and cocoa solids.
- Compound Coating (Candy Melts, Almond Bark, Baker’s Coating): These products substitute cheaper vegetable fats (like palm kernel oil) for most or all of the cocoa butter. They melt easily and harden quickly without needing tempering, making them convenient for simple dipping or coating. However, they lack the rich flavor, characteristic snap, and smooth melt of real chocolate. This article focuses on working with REAL chocolate.
Key Types of Real Chocolate:
- Dark Chocolate: A blend of cocoa solids, cocoa butter, sugar, and lecithin. The percentage (%) shown often refers to the total amount of ingredients derived from the cocoa bean (solids + butter).
- Bittersweet: Typically higher percentage (e.g., 60-85%+), intense chocolate flavor, less sweet.
- Semisweet: Slightly lower percentage (e.g., 40-60%), balanced flavor, moderately sweet.
- Uses: Ganaches, mousses, fillings, sauces, anywhere intense chocolate flavor is desired. Requires tempering for coatings/decorations.
- Milk Chocolate: Contains cocoa solids, cocoa butter, sugar, lecithin, andmilk solids. The milk solids give it a milder, creamier flavor, lighter color, and softer texture compared to dark chocolate.
- Uses: Ganaches, fillings, mousses, coatings, eating. Requires tempering (at lower temperatures than dark chocolate).
- White Chocolate: Technically not “chocolate” in the strictest sense as it contains no cocoa solids. It’s made from cocoa butter, sugar, milk solids, and lecithin.
- Uses: Coatings, ganaches, mousses, decorative elements. Flavor is sweet and creamy. Quality varies greatly – look for brands with a high percentage of cocoa butter (30%+) and real vanilla. Very sensitive to overheating. Requires tempering (at the lowest temperatures).
- Couverture Chocolate: This isn’t a type based on flavor, but rather a quality designation. Couverture (French for “covering”) is high-quality chocolate (can be dark, milk, or white) formulated with a higher percentage of cocoa butter (generally 31% or more) than standard chocolate.
- Why it’s Preferred: The extra cocoa butter makes couverture much more fluid when melted and properly tempered. This fluidity is ideal for creating thin, even coatings (enrobing), dipping candies or fruits, making hollow figures or thin chocolate shells in molds, and creating delicate decorations. It also typically results in a harder snap and beautiful gloss. While standard chocolate can be tempered, couverture yields superior results for these applications. It’s the choice of most professionals.
Choosing Quality: For best results, especially when tempering, use good-quality chocolate specifically designed for baking or confectionery, often sold in blocks, bars, or small discs/wafers (callets, pistoles, fèves). Avoid using standard chocolate chips, as they often contain less cocoa butter and added stabilizers designed to help them hold their shape during baking, which can interfere with proper melting and tempering. Check ingredient lists and cocoa/cocoa butter percentages.
The Tempering Imperative: Why Melted Chocolate Isn’t Enough
So, you’ve chosen your real chocolate. Why can’t you just melt it, use it, and let it cool? The answer lies in the complex crystalline structure of cocoa butter.
The Science (Simplified): Cocoa butter is polymorphic, meaning it can solidify into several different crystal structures (at least six, labeled I through VI or Gamma, Alpha, Beta Prime, Beta). Only one of these, the Beta (V) crystal, is stable, desirable, and gives tempered chocolate its characteristic properties. When you melt chocolate completely, you destroy all existing crystal structures. If you simply let it cool down naturally, unstable Alpha and Beta Prime crystals tend to form randomly.
Consequences of Untempered Chocolate: This haphazard formation of unstable crystals leads to undesirable results:
- Dull, Matte Appearance: The uneven crystal structure doesn’t reflect light well.
- Streaks or “Bloom”: Unstable fat crystals (fat bloom) can migrate to the surface, creating white or grayish streaks and spots. Sugar bloom (a gritty surface) can occur if moisture condenses on the chocolate.
- Soft or Crumbly Texture: Lacks the satisfying hard “snap” when broken.
- Melts Easily: Becomes soft or melts readily on contact with fingers.
- Poor Contraction: Doesn’t shrink properly when cooling, making it difficult to release from molds.
What is Tempering? The Goal = Stable Beta Crystals: Tempering is a carefully controlled process involving heating, cooling, and agitating (stirring/mixing) melted chocolate to specific temperatures. The goal is to encourage the cocoa butter to crystallize predominantly in the stable Beta (V) form. This creates an ordered, tightly packed crystal network throughout the solidified chocolate.
Benefits of Properly Tempered Chocolate:
- Glossy Shine: The uniform, stable Beta crystals create a smooth surface that reflects light beautifully.
- Hard “Snap”: The tightly packed structure results in a firm texture that breaks cleanly.
- Smooth Melt: Melts evenly and pleasantly in the mouth, releasing flavor optimally.
- Good Contraction: Shrinks slightly upon setting, allowing easy release from molds.
- Resistance to Bloom: The stable crystal structure minimizes the risk of fat or sugar bloom when stored correctly.
For any application where chocolate needs to set hard with a shine and snap – coatings, decorations, molded items, chocolate bars – tempering is essential. (Note: Tempering is generally not required when chocolate is an ingredient mixed into batters, doughs, mousses, or ganaches where it won’t be setting on its own as a coating).
Tempering Techniques: Achieving Stability and Shine
Mastering tempering requires precision, patience, and the right tools.
Prerequisites:
- Use Real Chocolate: Couverture works best due to higher cocoa butter content.
- Accurate Thermometer: A reliable digital instant-read or infrared thermometer is crucial.
- Clean, DRY Equipment: Bowls, spatulas, molds must be perfectly dry. Even a tiny droplet of water can cause chocolate to “seize” (become thick and grainy).
- Controlled Environment: Ideally, work in a cool (around 68-72°F / 20-22°C), low-humidity environment. High humidity makes tempering difficult.
The Temperature Curves (Crucial Ranges): Each type of chocolate needs to be heated, cooled, and then slightly re-warmed to specific temperature ranges to achieve temper. These ranges can vary slightly by brand (check packaging if available), but typical targets are:
| Chocolate Type | Melt To | Cool Down To | Re-warm To (Working Temp) |
|---|---|---|---|
| Dark | 115-120°F (46-49°C) | 82-84°F (28-29°C) | 88-90°F (31-32°C) |
| Milk | 110-115°F (43-46°C) | 80-82°F (27-28°C) | 86-88°F (30-31°C) |
| White | 105-110°F (40-43°C) | 78-80°F (26-27°C) | 82-84°F (28-29°C) |
Exportar para as Planilhas
Common Tempering Methods:
- Seeding Method: Relies on adding solid, already tempered chocolate (“seed”) to melted chocolate to encourage proper crystallization.
- Gently melt about 2/3 of your chopped chocolate (over a double boiler or carefully in microwave) to the target “Melt To” temperature.
- Remove from heat. Add the remaining 1/3 finely chopped, untempered chocolate (the seed).
- Stir constantly and patiently until the seed chocolate melts completely and the mixture cools down to the target “Cool Down To” temperature. The stable Beta crystals in the seed encourage the melted cocoa butter to form the same stable structure.
- Gently re-warm the chocolate very carefully (brief bursts over double boiler or microwave, stirring constantly) just until it reaches the target “Working Temp” range. Do NOT exceed the working temperature, or you’ll lose the temper!
- Pros: Relatively clean method, no special surfaces needed. Good for home kitchens and smaller batches.
- Cons: Can be slow if seed pieces are large. Requires having reserved untempered chocolate. Need to stir diligently to ensure even cooling and melting.
- Tabling Method (Classic Professional Method): Uses a cool surface for rapid cooling and agitation.
- Gently melt all your chopped chocolate to the target “Melt To” temperature.
- Pour about 2/3 of the melted chocolate onto a clean, cool, non-porous work surface (marble or granite slabs are traditional).
- Using an offset spatula and a bench scraper, continuously work the chocolate across the surface – spreading it thin, then scraping it back together. This provides cooling and essential agitation.
- Continue tabling until the chocolate thickens noticeably (becomes paste-like as Beta crystals form) and reaches the target “Cool Down To” temperature.
- Immediately scrape the cooled, thickened chocolate back into the bowl containing the remaining 1/3 warm melted chocolate.
- Stir thoroughly to combine and distribute the stable crystals. Check the temperature – it should be within the “Working Temp” range. Adjust slightly with gentle heat if needed, being careful not to overheat.
- Pros: Fastest method for cooling and tempering larger batches. Excellent agitation promotes good crystal formation.
- Cons: Requires a suitable, dedicated cool work surface. Can be messy until mastered. Takes practice.
- Microwave Method (Quick Temper for Small Batches): Relies on carefully controlled melting to preserve existing Beta crystals.
- Place finely chopped tempered chocolate (chocolate that hasn’t been fully melted previously, like from a bar or callets) in a microwave-safe bowl.
- Heat on medium power (50%) in very short bursts (15-20 seconds for small amounts, maybe 30 seconds for larger). Stir thoroughly after every burst.
- Continue heating and stirring until almost all the chocolate is melted, but some small lumps still remain (about 75-80% melted).
- Remove from microwave and stir continuously until the residual heat melts the remaining lumps and the chocolate becomes smooth. The goal is to never let the bulk of the chocolate get hotter than the final working temperature.
- Pros: Fast, minimal equipment. Good for quickly tempering small amounts if starting with already tempered chocolate.
- Cons: Very easy to overheat and destroy the temper, requires careful monitoring and frequent stirring. Less precise control. Not ideal for large quantities or if starting with completely untempered chocolate block.
Checking the Temper: The best way to confirm temper is the “set test.” Dip the tip of a knife, spoon, or piece of parchment paper into your tempered chocolate. Set it aside at cool room temperature (around 68-70°F / 20-21°C). Properly tempered chocolate should set firm and glossy within 3-5 minutes, with no streaks. If it remains soft, dull, or streaky after 5+ minutes, it’s not in temper, and you’ll need to restart the process.
Basic Chocolate Techniques for Pastry
Once tempered (or simply melted, if tempering isn’t needed for the application):
- Melting Chocolate: Always use gentle, indirect heat.
- Double Boiler (Bain-Marie): Place chopped chocolate in a heatproof bowl set over a saucepan of barely simmering (not boiling) water. Ensure the water doesn’t touch the bottom of the bowl. Stir occasionally until smooth.
- Microwave: Use a microwave-safe bowl. Heat on medium or low power in short intervals (15-30 seconds), stirring well after each interval until melted and smooth.
- CRITICAL: Keep Water Away! Even a tiny drop of water contacting melted chocolate can cause it to “seize” – becoming a thick, stiff, grainy, unusable mass. Ensure all bowls and utensils are perfectly dry.
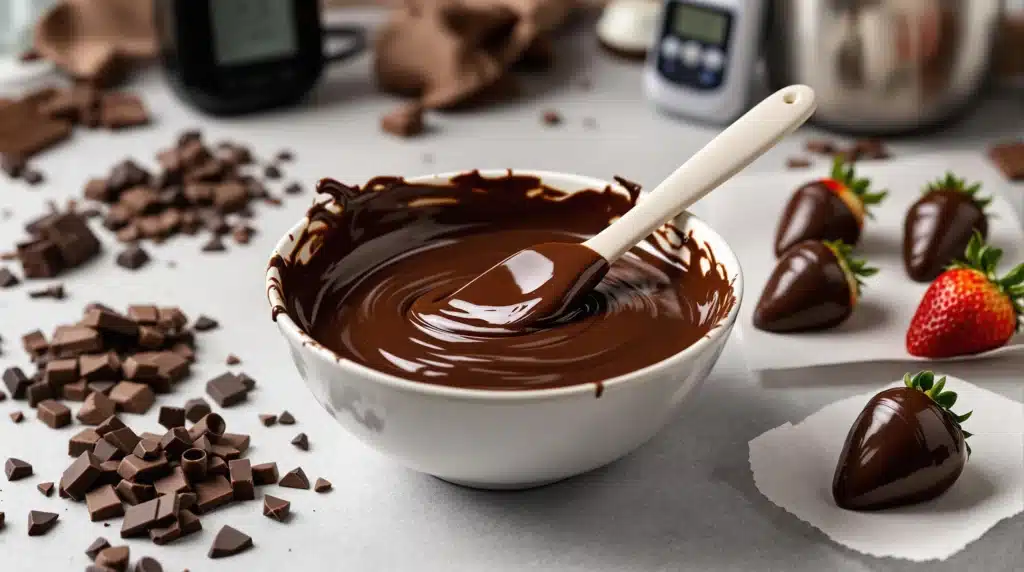
- Dipping: Use properly tempered chocolate held within its working temperature range. Dip items (strawberries, cookies, truffles), allow excess to drip off (tapping gently helps), and place on parchment paper or a wire rack to set completely. If chocolate cools too much, re-warm gently back to working temp.
- Simple Decorations:
- Shavings/Curls: Use a block of room-temperature tempered chocolate and scrape with a vegetable peeler or along the edge with a knife.
- Piped Designs: Fill a small parchment paper cone or piping bag fitted with a small round tip with tempered chocolate. Pipe lines, squiggles, letters, or shapes onto parchment paper. Let set completely, then carefully peel off.
- Chocolate Bark: Spread tempered chocolate thinly onto parchment paper. Sprinkle with nuts, dried fruit, or candy pieces while still wet. Let set completely, then break into irregular shards.
- Transfer Sheets: Spread tempered chocolate thinly and evenly over plastic acetate sheets printed with colored cocoa butter designs. Let set partially, cut into shapes if desired, let set fully, then peel away the plastic to reveal the transferred pattern.
Troubleshooting Tempering & Chocolate Work
- Seized Chocolate (Thick/Grainy): Caused by water contamination. Very difficult to salvage for tempering. Might be usable in ganache or baked items where texture is less critical by adding more fat or liquid, but its behavior changes. Prevention (keeping everything dry) is key.
- Bloom (White Streaks/Spots): Fat Bloom (most common) is caused by unstable cocoa butter crystals migrating – usually from improper tempering or storing chocolate where it experiences temperature fluctuations. Sugar Bloom (gritty surface) is caused by moisture dissolving sugar, then evaporating, leaving crystals – usually from condensation during storage (e.g., refrigerating improperly). Tempered chocolate stored correctly resists bloom better. Bloomed chocolate is safe to eat and can often be re-tempered (if fat bloom) or used in melting applications.
- Temper Lost (Chocolate Thickens/Sets Too Fast): The chocolate cooled below its working temperature range. Fix: Gently re-warm very slightly (just a degree or two), stirring constantly, back into the working range. Do not overheat!
- Temper Not Achieved (Doesn’t Set Properly, Dull, Streaky): Common causes: Didn’t cool down enough during the cooling phase; insufficient agitation (stirring/tabling); overheated during the re-warming step; seed chocolate wasn’t enough or didn’t incorporate properly. Fix: Unfortunately, you need to start the entire tempering process over again.
Conclusion: Harnessing Chocolate’s Allure
Chocolate is more than just an ingredient; it’s a medium with its own personality and demands. Using high-quality real chocolate forms the foundation, but mastering tempering is the non-negotiable key that unlocks its full potential for creating professional-looking and -tasting pastry work – the captivating gloss, the satisfying snap, the smooth melt, the clean release from molds.
While the process requires precision, careful temperature control (get those thermometers!), attention to detail (keep it dry!), and patience, methods like seeding make it accessible even in a home kitchen. Understanding why you temper – to cultivate those stable Beta crystals – demystifies the process. Practice tempering, learn to recognize the signs of properly tempered chocolate, and explore basic techniques like dipping and piping. By respecting chocolate’s charismatic nature and learning its language through tempering, you’ll gain the confidence to create truly stunning, delicious, and professional-quality chocolate elements for your desserts.